PBR - From Rules to Measurements

Preface
Confusion
Making the Gear
Shooting the Images
A lucky find
The results
Conclusions
Preface
This article is about my PBR measuring adventures, going from making the gear, to capturing, to calibrating the resulting images - and what I learned on the way. This is NOT a definitive guide to capturing PBR textures. I do not claim that this is the absolute correct way to do it. This article is all about me noticing a problem and trying to figure out what's actually going on. If you find anything that is wrong, could be improved or is generally just not accurate PLEASE let me know. Part of the reason why I am publishing this in the first place is to get feedback on it.
Update 07/2023: There's now a follow-up article about the shooting and calibration itself, going into much more detail and providing methods to test the refined methodology. It is basically the evolved version of the one here but with a focus on the technical side and not the more basic discussion about the issue itself.
PBR - Shooting and Calibrating Basecolor Textures
Confusion
Some weeks ago a colleague and I were discussing a wood texture for a specific asset. It looked right but was definitely way too dark for what I understood were the basic PBR rules. So, we adjusted the Basecolor until it exceeded the absolute minimum Albedo limit and yet... it just didn't look right anymore. I couldn't explain to my colleague why that was the case. From my understanding one of the darkest naturally occuring materials is charcoal - with an Albedo of 0.04 or 4%. So given that, it makes sense to say that no other natural material should be darker. 0.04 in linear srgb turns out to be around srgb 50 50 50 (8bit nonlinear, with gamma) - which incidentally is also the limit of the PBR validator in the substance tools from Adobe. If you google Albedo tables you will find lots of tables for PBR materials that state exactly these Albedo values. In fact, if you google around and read some PBR guides you will eventually find Sébastien Lagarde's 2011 Feeding a physically based shading model article in which he states:
Fresh asphalt 0.04
Worn asphalt 0.12
[...]
One of the darkest substances on earth is charcoal, the brightest is fresh snow.
Diffuse color of the above substances should be a little less than provided value which includes some specular.
This allows to define a range for diffuse color in sRGB of 50-240.
[...]
For dark values, you should not go under 30-50 sRGB. The range for dark values could be more tolerant at 30 sRGB and stricter at 50 sRGB. For bright colors, you should not have any values that are higher than 240 sRGB (Figure23).
Making the Gear
So, since the PBR guidelines didn't have any answers and I didn't know which textures I could trust, the only reasonable solution was to measure some albedos myself. Over the next few weeks I built myself a little cross-polarized portable ring light rig that I could use to shoot my own samples. The ring on the front can be turned 90° to make both cross- and nonpolarized images. Everything is powered by a 24V 65W power bank.
I won't go into the details on how it works and why you need it, there are plenty of resources out there just for that (and I plan to make another post about just the rig itself). Long story short: Cross-polarising effectively means canceling out any specular reflections from the light source so only diffuse, internally-bounced light can be seen by the camera - what you would call a BaseColor texture.

The rig
Shooting the images
With the gear finished I needed a reference to adjust my images to. I went with a Color Checker Passport 2, since this is probably the most used type of color chart out there. It's stupendously expensive for what it is but also without real competition.
With that, the next step was creating a profile that corrects the camera colors to the reference. There are different ways to do this but after quite a bit of experimentation I found 3 different options where only one is recommendable:
- The Color Checker Camera Calibration Software that ships with the Chart. Don't bother. This is incredibly slow, super picky with the input and overall quite frankly impressively bad. Also, no settings whatsoever.
- Next option is the DNG profile editor from Adobe. This one is fast and most importantly can export linear profiles (more on that in a bit) but has one major flaw: It's too old. The Color Checker formula was revised in 2014 and the colors changed slightly. Unfortunately, the software was made before that and the profiles have never been updated. If you don't care about the colors, just values, this is still a valid and free option.
- The third option and what I am using now is the Lumariver Profile Designer. It costs about 30€ in the smallest version but supports linear profiles, the modern color checker swatches, and has a ton of other features that you may or may not need. Either way, it's perfect for the task.

Tonecurve of a standard Raw processing profile
So what's up with this curve and why do we need to remove it? As with everything in CG, what we want is doing our math on linear input. Every Camera or RAW file processor adds a tonemapping curve onto your images to make them more pleasing to the eye, the same way you do with your renderings to make them look pretty in the end. However, since we're making measurements, we want linear images - so we need to remove that tonemapping curve.

Left: Original Photo - Right: processed Linear Image (with gamma for display)
After processing our images with that flat linear profile, we can export them and adjust them in an application of our liking. In my case I use Blackmagic Fusion.
But in order to do that, we need to know what these color swatches represent. So after quite some digging I found a source with believeable, updated, and tested results: https://babelcolor.com/colorchecker.htm
The problem is... these reference color values are not diffuse-only references but contain some specular part as well. I tried different sets of values and adjusted the levels of my images to match the black and white patch reference values of the color checker - none of them looked plausible, especially in a rendering. What made me suspicious at that point was that the black patch was already really dark straight out of Lightroom. So any adjustment on that obviously resulted in a washed out and hazy texture - which was in line with the PBR guides but still felt odd.
I then tried to remove the specular part from the reference values by subtracting photos of polarised and nonpolarized charts which again resulted in a really dark value for black.
A lucky find
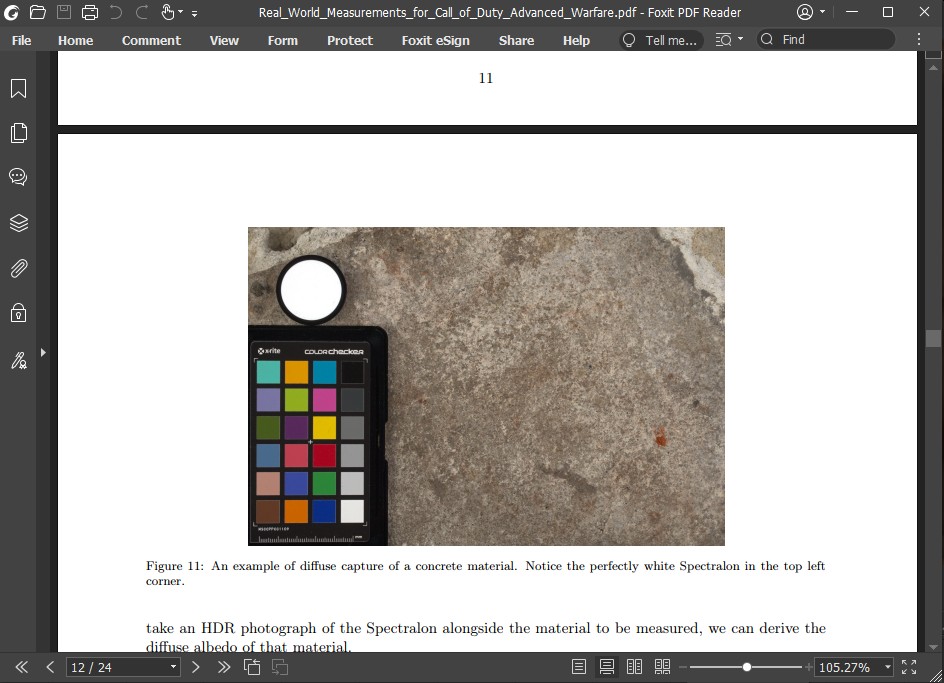
Being close to giving up I made another attempt at finding a source for polarised reference values and luckily found an old article from activision: Real-World Measurements for Call of Duty: Advanced Warfare. The whole PDF is a treasure trove in itself but what really sparked joy here was that their method of capturing textures was very close to mine - with one important difference: They use "spectralon", a material that has an albedo of over 99% and being very close to Lambertian reflectance. With that, they have a very reliable reference and all they do is adjust the exposure of the linear image to match the spectralon surface to pure white.
This has some important implications:
- They don't modify the image in any other way than just multiplying
- The black patch of the color checker is in fact really dark
- If the linearization is done properly, the process of adjusting the input image is very easy - given you have a known reference like spectralon.
Unfortunataley for me, spectralon is prohibitively expensive - but - the pdf also contains an image of spectralon right next to a color checker chart. Exactly what I was looking for. I can use that image to calibrate my chart.

Spectralon Reference right next to a color checker chart
The results
With that reference and a credible source for it, I made a few tests and the results seem promising. After adjusting the exposure, my color chart matches very well to theirs and thus I am willing to conclude that these measurements are trustworthy. Also... the renderings look rather nice, and that's after all what started all of this in the first place.
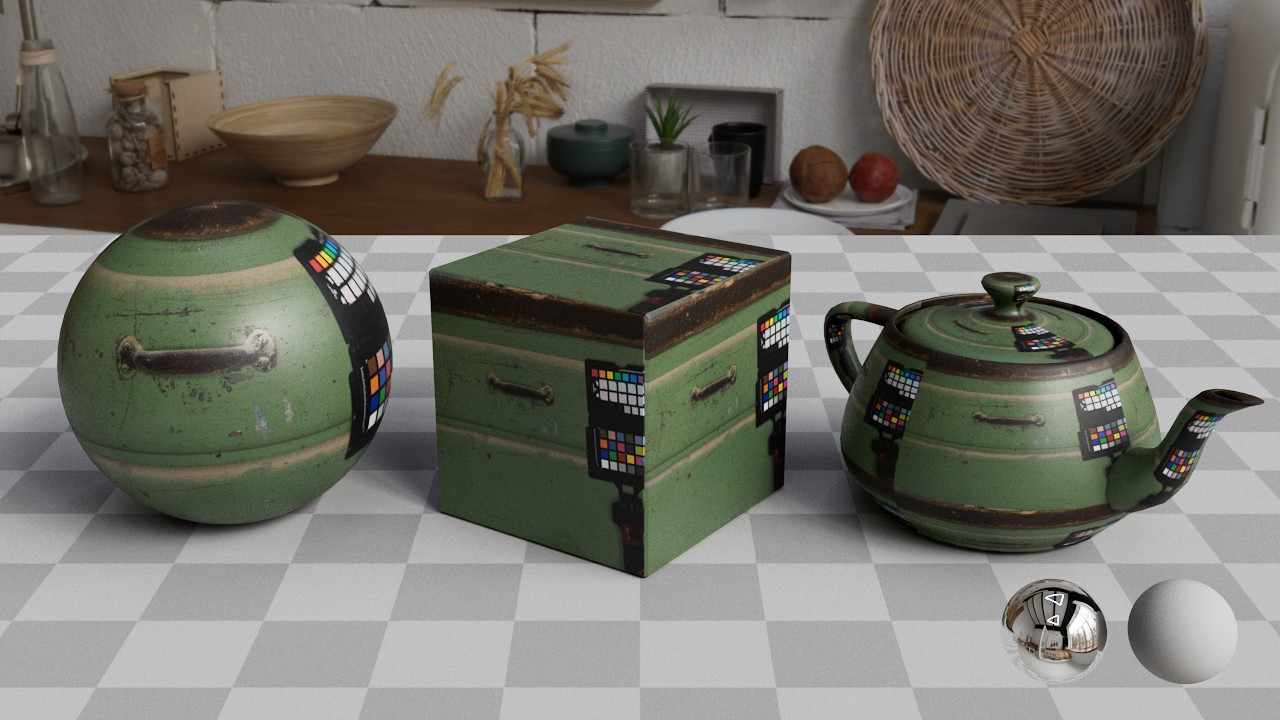
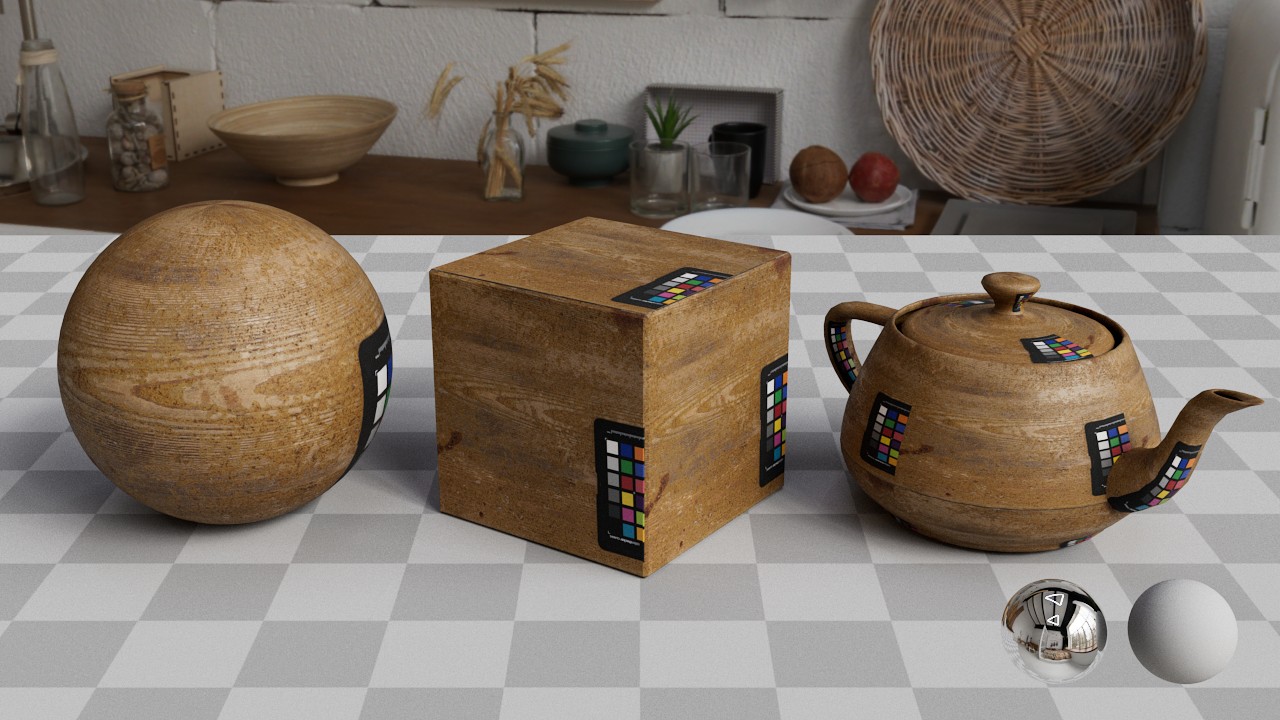
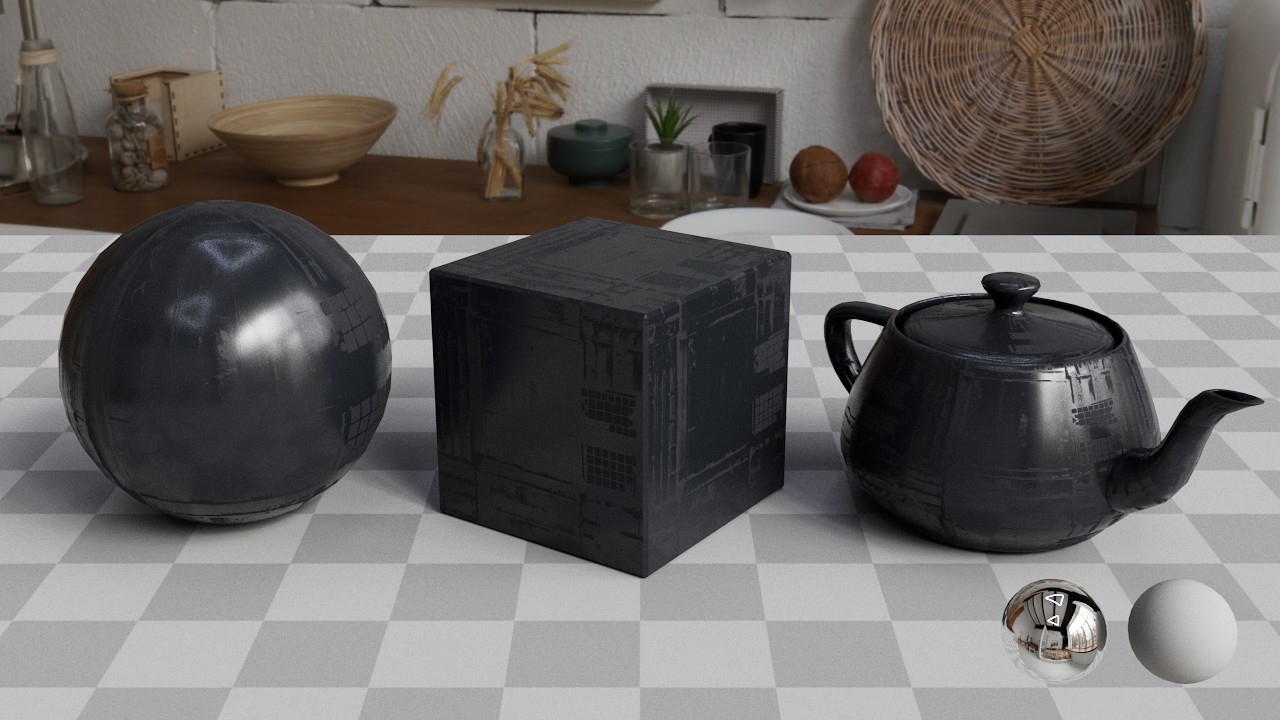
Here are a few examples of the texture and the resulting renderings. The left view is the finished BaseColor texture, the middle one is diffuse + reflections (adjusted for the exposure on the left). You can already see here how much the Reflections contribute to the color - though keep in mind that's while blasting it with a big light source perpendicular to the surface which is basically the worst case. The right view is how the camera took the picture, including tonecurve and no adjustments to the exposure. The point here being that you can not infer a BaseColor texture from a photograph.
All the renderings are made using aces colormangement, including the aces tonemapping curve within the Output_sRGB view transform. This means all the images have an S-curve like tonemapping and are thus more contrasty than a classic just gamma corrected rendering.
I specifically chose an hdri with neutral lighting and background objects to have some reference to real world objects (and a bit of a sanity check).


You may have noticed that the black plastic looks really dark, but keep in mind, that's with a contrasty S-curve. There's still a lot of detail in the rendering, - which is basically all coming from the reflections. Also compare it to the black cup in the background.
Here's an example of what it would look like if the Basecolor were srgb 50. Despite the tonemapping, the material looks awful and washed out. I think you can imagine what it would look like without the S-Curve.

There's another thing that you may have noticed. Some of the wood still looks somewhat shiny, despite the polarisation. I'm not exactly sure when this happens (some tests are in order) but since this wood is painted, there's probably a chance that this acts like a coating. Meaning there are two layers of reflection where only one gets canceled correctly. One more thing that could be an issue is anisotropic spread or scattering due to the fibres in the Wood. I'm not sure how this affects the results. Another likely cause in this case is secondary reflections from the bounced light on the walls left and right to the door.
So this is something to keep in mind and probably needs to be fixed manually.

Here's an example of wood with a clear coat. Only the first layer of reflections are cancelled, the reflections of the wood itself are unfortunately still there.

Conclusions
What does all that mean in regards to the initial problem?
Time for another look at the Albedo tables. In case of charcoal, the charts say that it has an albedo of 4%. But that includes both Diffuse AND specular. The metalness workflow only exists because the assumption is made that the vast majority of dialectric materials have about the same specular reflectance ( F0, the amount of reflection when looking perpendicular on a surface) and that is 4%. There are differences but it's not that much. Coming back to the Article of Sébastien Lagarde where he wrote:
No value under 0.02
Common gemstones 0.05-0.17
Common liquids 0.02-0.04
When not finding reference for a dielectric material, setting a value of 0.04 (around plastic)
Except gemstones, any dielectric material we will use should be in the range 0.02-0.05 [1].
So, what does that mean for any other material? Assuming 4% specular reflectance part in the albedo for most materials, that is srgb 50 right there already. So, something like black plastic should have a much much darker BaseColor than that, since the 4% minimum albedo is already used up for the specular part - and that seems to match the measurements. I made a few comparisons of materials I shot and materials I found on substance source and megascans and the BaseColor values were surprisingly close. Adding the article from Activision to this, and it seems that the thought process can't be completely wrong.
So, to test this, have a look at this comparison:

The left image is the Material with reflections turned off,
the middle image shows Basecolor and F0 4% reflections with 100% roughness (metalness workflow),
the right image is Basecolor liftet by 4% but without reflections again.
Pretty close I would say. There are of course some differences, as you would expect from a simulation with shading models and biases here and there, but I think it shows the idea.
Gotchas
That said, all of this begs the question: why is the PBR validator so far off then? If the albedo of dark objects is mostly reflections, why are the PBR guides stating otherwise? And why is Substance Source distributing Materials that are not within their own specifications. I don't have an answer to that, and the fact that the solution to the problem seems so obvious makes it even harder to believe.Even though the measurements seem to be accurate, I have to stress that this is not on a scientific level. There are a lot of variables in my measurements and gear that I cannot compensate for. Starting from the LEDs and their relatively poor CRI rating, to the polarizer sheets, to the light distribution on the objects while shooting, and last but not least the several layers of "reference value conversion" that happened on the way. Also, placement of the chart relative to vignetting or light falloff is a consideration here and will skew the results somewhat. None of this is lab-grade albedo measuring and thus these examples are primarily meant to be used as a source for tuning your intuition on how BaseColor textures should probably look like.
That said, I don't believe any of these issues radically changes the outcome and conclusions.
Another possible argument is that the Albedo tables as referenced above state the amount of energy reflected over a wider range of wavelengths while we - in rendering - only use the visible range. However, this would still make those albedo tables and lower limits effectively useless for us and the measured ones the only trustworthy (since it's in the same range of visible wavelengths).
Takeaways
- The darker the BaseColor of the material, the more reflections contribute to the overall look. That means that if you are not getting the F0 value or the Roughness exactly right, it will look wrong. This is why I shoot both the cross-polarized image and a regular one for reflection reference.
- BaseColor textures can be much darker or contrasty than you may assume and are generally more saturated than the rendererd material will look like in the end. The Reflections will add quite a bit of milkiness on top.
- BaseColor textures from the web may or may not be correct - you can't really ever say from just looking at it. They may have specular parts in it, or the tonemapping curve was never removed, or is generally just too bright or dark. Imho that also means that using properly shot reference may be a good idea if you edit materials yourself in Substance Designer for example.
- Shooting textures without cross polarisation isn't a good idea in my opinion, but you may get away with it if the material is sufficiently bright and thus the reflections contribute comparatively less. Dark materials absolutely need cross polarisation.
- If you don't use reflections in your materials for reasons like rendertime savings (like for very rough and dark cloth) you absolutely need to compensate for the specular part of 4% .. somehow.
Update 07/2023: There's now a follow-up article about the shooting and calibration itself, going into much more detail and providing methods to test the refined methodology. It is basically the evolved version of the one here but with a focus on the technical side and not the more basic discussion about the issue itself. PBR - Shooting and Calibrating Basecolor Textures